
Another Scrappy Saturday was an interesting post created in December of 2014 to share with my readers a great use for scraps. Like any crafter, scraps are a by product and either a) take up so much space or b) given away to someone else. My goal in 2015 is to use scraps more frequently to make the most of my money and my materials. The second week of January has the theme of Barbie.
I have spoken previously about not having a craft store less than 50 minutes away from me, so what I have found comes from local stores like Goodwill (great bargains), Walmart (unfortunately), Dollar Tree (great place for ribbon), Lowes (yep), and The Dollar General. We have a small store named Fred's that has a few good deals as well. Because I am somewhat limited in what I can use, it requires me to be a little bit more crafty.
This week's Scrappy Saturday is a Barbie Art for her dream house. Let's face it. Barbie's Dream house when bought in the stores is super expensive. The art inside comes in the form of stickers. It's a little unappealing. For crafters, this is an easy fix!
Because I craft with multiple mediums, I chose to create a piece of art for Barbie's dream house using foam board and designer paper. I have seen multiple printable art pieces for miniature dollhouses, but I choose to use my scraps to make them.
Be forewarned. I did not take any measurements. I slapped it together quickly, but I will show the pictures and how I accomplished them.
Here's the list:

Materials:
Two pieces of foam board
2 way glue for adhering paper (or hot glue if you wish)
Some thread or yarn
6x6 or smaller pieces of designer paper (2)
Scissors
To begin, cut two sizes of foam board with scissors. I didn't worry about getting the shape exact. I got two rectangles. (Not pictured)
Next cut two pieces of designer paper larger than your foam board pieces.


And now you have two art pieces to hang on the wall of your Barbie house.
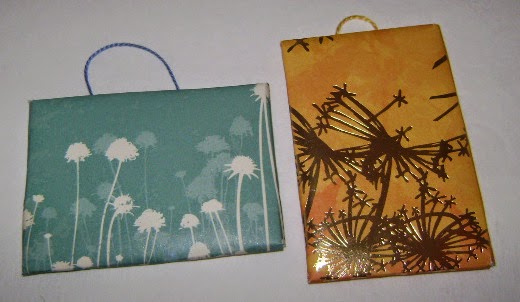
If you are using a wooden Barbie house, you can use some gold or silver thumb tacks to hold them on the wall. These are light weight art pieces that allows you to create any number of pieces to match the decor or personalize your child's play house.
I have spoken previously about not having a craft store less than 50 minutes away from me, so what I have found comes from local stores like Goodwill (great bargains), Walmart (unfortunately), Dollar Tree (great place for ribbon), Lowes (yep), and The Dollar General. We have a small store named Fred's that has a few good deals as well. Because I am somewhat limited in what I can use, it requires me to be a little bit more crafty.
This week's Scrappy Saturday is a Barbie Art for her dream house. Let's face it. Barbie's Dream house when bought in the stores is super expensive. The art inside comes in the form of stickers. It's a little unappealing. For crafters, this is an easy fix!
Because I craft with multiple mediums, I chose to create a piece of art for Barbie's dream house using foam board and designer paper. I have seen multiple printable art pieces for miniature dollhouses, but I choose to use my scraps to make them.
Be forewarned. I did not take any measurements. I slapped it together quickly, but I will show the pictures and how I accomplished them.
Here's the list:
Two pieces of foam board
2 way glue for adhering paper (or hot glue if you wish)
Some thread or yarn
6x6 or smaller pieces of designer paper (2)
Scissors
To begin, cut two sizes of foam board with scissors. I didn't worry about getting the shape exact. I got two rectangles. (Not pictured)
Next cut two pieces of designer paper larger than your foam board pieces.
Cut the corners out of the paper. Pictured below. I didn't worry about 90 degree angles.
Put glue on the flaps and fold them onto the foam board. Remember to press firmly until the glue adheres. (Not Pictured) Repeat for all four sides.
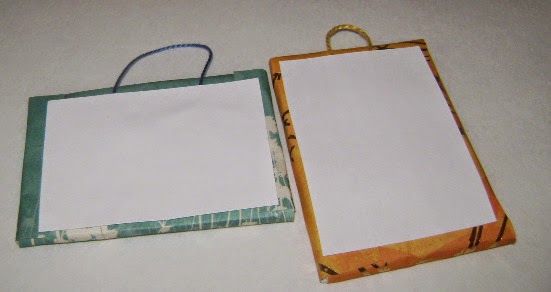
Next, cut two pieces of white card stock to fit the back and two pieces of string/yarn/ribbon to hang your art pieces.
Place a small dot of glue on the back to hold the thread in place. Place glue on the piece of card stock and center on the back of the art piece and press firmly.
This is how they will look after this step.
And now you have two art pieces to hang on the wall of your Barbie house.
No comments:
Post a Comment