Showing posts with label ribbon. Show all posts

Saturday, January 24, 2015

Another Scrappy Saturday - Ribbon and Bookmarks - Photo Heavy

Okay! You may have noticed that I have been making a lot of bookmarks in the last few months. *shifty eyes* I do not have a problem. I promise. LOL! But, I do have a lot of nieces, nephews, sisters, cousins, and such who love to read and who I needed to make gifts for. This week's bookmarks made on Monday were lacking the ribbon part. So I wanted to use some scrap ribbon to add some.

On one trip to my local Dollar Tree, I found some beautiful gossamer pink ribbon. It sparkles! It was the closest color I could find in my stash that relatively matched the color scheme of the tie-dyed bookmarks. So I decided to give it a try. Here's a quick tutorial on adding ribbon to your bookmarks.

*Note* This post contains a sneak peak into next week's Scrappy Saturday project!

Materials
Finished bookmark
Hole punch (standard size)
Ribbon


1. Punch a hole near the top of the bookmark. In the photo below, you can see that I punched one slightly higher than the other. I found that it looked better in the end product, but both still look really good.


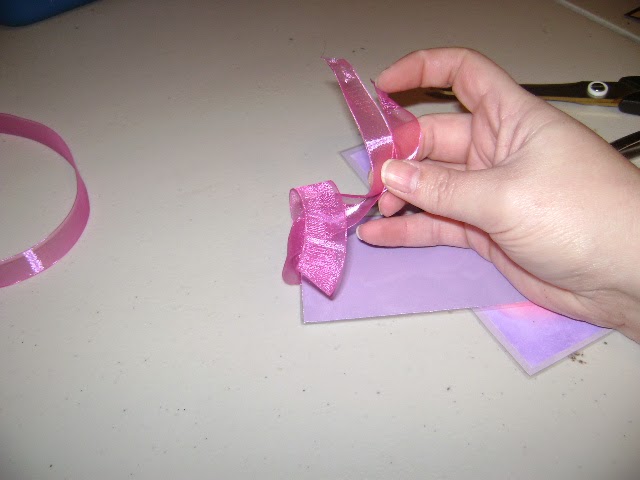
2. Take ribbon and fold it in half. With the ends, fold them in half and half again. It should be able to fit into the hole.


3. Insert the ribbon into the hole from the back of the bookmark.


4. Pull the ribbon until half of both ends are on each side.


5. Insert the ends of the ribbon through the loop.


6. Now pull tight. Cut the ribbon to a shorter length if you wish.


Here's the finished product. Two bookmarks with gossamer ribbon for my two older nieces.


Now that you have a tutorial on how to add ribbon to your bookmarks, you can effectively add ribbon to any project similar to this.

Wishing you a happy crafting day,
Sarah

Saturday, October 4, 2014

Clothespin Snowflakes - Photo Heavy

I recently saw a pin on Pinterest for a cute and inexpensive ornament that had my heart aflutter. Snowflakes, snow, and snowmen are my most favorite ornament and Christmas decoration out of everything. I can pass up Santa for a good snowflake! So when I saw this cute little pin, I knew I had to try it. I already had the glue sticks. I had the ribbon. All I needed was the clothes pins!

A few weeks ago, I found myself in the craft section of my local Walmart looking for clothespins. They had a set of 18 or so for almost 4 dollars. That makes this project less budget friendly. So I headed to the laundry section to see if they had a better pack for cheap. They did! A 50 pack for about $0.97. That is more than budget friendly as I could pick up 3 packs of 50 for the price of 1 in the craft section.

Materials:
50 pack of Wooden Clothespins from Walmart ($0.97)
Glue sticks (In stock)
Glue Gun (In stock)
Ribbon (In stock, but cost $1.00 per spool)

Optional: paint, glitter, craft glue, paint brushes


Now, for the instructions. I will be posting a set of pictures with the instructions below it. Please view all the instructions before beginning the project.


Here's the materials. I chose to not use paint and glitter, although I am looking into adding that later.


Twist the clothes pin until the twisted one pops out the spring.


Lay the one side off and pull off the spring.


It should be relatively easy. I have no use for the spring, so I just toss them.


Now you are let with both sides. Lay the sides with the straight sides up. Make sure the cut outs are facing the same way.


Place a line of glue along the pin.


Now that it is on, place the two sides together. Match up the cut out.


Here you can see what the glued pin looks like.


Tie the ribbon. I am going to show pictures of how I do it, but feel free to do it how you feel comfortable.


I actually added my ribbon into the pin as I glued it for the most stability. It is about an inch from the top of the pin.


Next, add some glue to the bottom of one pin and attach another completely opposite.


In the center, add another bead of glue and attach another pin.


Repeat for the other side.


Now, in each area between two pins, add glue and another pin. I did have some issues getting the pins to completely adhere due to the angle, but I just added some glue up the sides so the angles attach.


Here's the completed snowflake.


From one half of the package, I got three snowflakes. These are unpainted, but still beautiful.

One thing I would caution you about is that the glue does snow, but can be covered with paint and glitter to mask. I do not have a problem with the view of paint, but some may. The original pin shows these snowflakes stained as more of a vintage look. What I say is to do what you like with them!

In about 30 minutes, I had all three completed including taking photos for this post! That is a quick and inexpensive ornament. The cost breakdown is below.

Costs

8 clothes pins  -   $0.16
1/2-1 hot glue stick   -   $0.10
Hot glue gun  - free
Ribbon     -$0.16
_____________________
Total Cost - $0.42


Each pack of wooden clothespins (50) can make 6 snowflakes.

Happy Crafting
Sarah

Monday, April 21, 2014

Make it Monday - Sled Ornament

I announced this pattern on Saturday as part of my "Share it Saturday" routine! But first things first, here is the material list again:


  • glue gun
  • glue sticks
  • popsicle sticks (9 - 8 for sled and 1 just in case)
  • sturdy scissors
  • paint color of choice
  • scrap paper or newspaper
  • paint brush
  • yarn/twine/ribbon


 While this is a REALLY early Christmas ornament, I am preparing my booth with products for Autumn shows. The goal I have is to have many choices to purchase and have fun while I make them. I saw pictures of a similar sled on Pinterest and developed my own.

*Note: While this is a somewhat kid friendly project, I would remind everyone to use safety goggles and allow an adult to deal with the hot glue.

*Note: Although this project is pretty quick, you must leave time to dry.

1. Plug in glue gun to heat up. Be sure to place it on a piece of scrap paper to catch any dripping glue.

2. Cut one stick into two equal parts with a small overage. Two of these parts will fit across the bulk of the sled.


3. Place 5 popsicle sticks next to each other with the middle stick the highest, the next layer down just slightly, and the last two down further.


4. Using hot glue, place a small line of glue near the upper part of the sled and place 1 of the support beams from step 2 on top. I squished mine down to create a better hold. Repeat further down the sled.


5. Place a small bead of glue on each support beams at the very end and place the runner, holding in place until the glue hardens. Repeat for opposite side.


6. Allow time to dry.

7. Using paint brush, paint the sled on one side. Let dry. Repeat on opposite side. Let dry.


8. After cutting the ribbon/twine/yarn to the desired length for the hanger, place a small bead of hot glue next to the top support brace on the underside of the sled. Quickly place one end of your hanger into the glue. Repeat on opposite side.


You can obviously embellish this sled how you want. I have ideas to put names and the year on the sled so that whoever receives the ornament will have a date for memories in the future. I would love to see any projects you do with this tutorial. You can send the photos to smchatton.writer@gmail.com or visit my Facebook page, Dande Creations, to share.

I found packages of popsicle sticks at my local Dollar General on sale 25% off. I bought 5 packs for $3.75. I did pick up a new pack of glue sticks a few weeks ago, but you hardly use half a stick for just one sled. I also had crochet thread to create the hanger; however, the price is very low with the amount you use. Paint was also relatively cheap. For me, it was free. I had purchased paint samples at Lowes when we painted our kitchen and it was the perfect time to use them. The beautiful, deep blue was a perfect winter-y/Christmas-y color.

Costs

8 Popsicle sticks - $0.08 on sale
Hot glue stick - $0.16
Thread - Free
Paint - $0.10
-------------
$0.34 per sled
Round up to $0.40 for thread (generous)

So for 40 cents, you have a sled.

My packs of sticks had 80 sticks so I can get 10 sleds from one pack! What a great, frugal way to make gifts for the holidays, crafts for the kids, or products to add to your holiday craft booth!

Happy Crafting,
Sarah


Monday, April 14, 2014

Make it Monday: Washcloth Lollipops
Originally, I was going to build a riser for my booth that would hold soap or my dolls. With such a busy week, I did not have the time to get the required material - which is more foam board. But, I found something to make for Make it Monday.

One day last week I saw a cute gift idea on a diaper cake. Two of my sisters are pregnant right now which had me wondering about baby shower gifts. It was this cute lollipop with some type of cloth. When I focused on it, I found that it was a washcloth lollipop. Well, I had no clue how to accomplish this. I looked on youtube and found a good video that showed me how to accomplish this lollipop and a "hard" candy.

Since we are adding soap and other beauty products to our booth, we are also increasing the washcloths and other spa items as well. A surplus of washcloths means a new, cute type of product display.

My goal today is to create some washcloth lollipops to display in my booth in Fall. I spent the last two days crocheting (and paper crafting) a few washcloths to try with this.

What you will need:

Washcloths
Wooden dowels
Ribbon
Cello/Treat bags


2 washcloths
Green is my Star Stitched Washcloth pattern 6x6
Pastel is in Baby Print and just a single crochet at 8.5 x 8.5


Shaped Cello Bags
6 inch wooden dowels
*I bought 12 inch as well and probably would have preferred it to these*


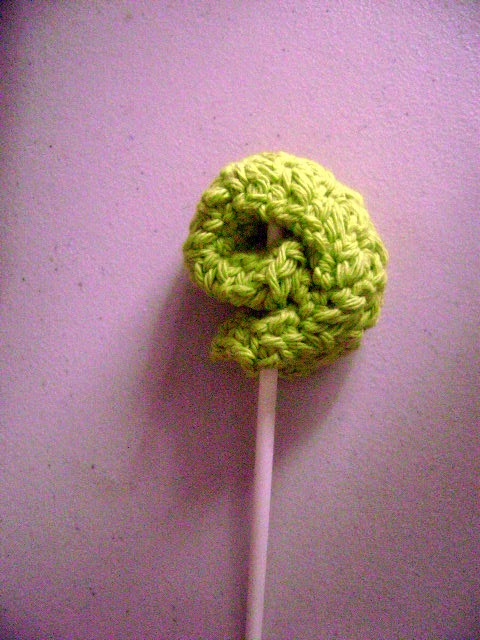
Roll up the washcloth.
The tutorial showed corner to corner, but with a crocheted washcloth that was too much bulk to swirl. 


Swirling the washcloth


Finished swirling


Insert dowel


Put in cello bag


Repeat with other washcloth


Finished swirl


Finished with ribbon and in bags

I will readily admit that taking photos of this was difficult. So I gathered my hubby up and made him take photos...with a sweet smile on my face of course!

The project is not only really quick, but cheap. I am pretty sure the bag of cello bags was $3.50 at Walmart for 100. The ribbon was only $0.49. The wooden dowels were around $2.00 and that is rounding up. The yarn was only $1 dollar a skein, but I can get multiple out of each skein so roughly $0.50.


Total per washcloth lollipop

$0.04 cello bag
$0.01 ribbon (probably less than that)
$0.10 wooden dowel (Rounded up)
$0.50 washcloth handmade
______

$0.65 PER washcloth

Not only is this a cute gift to give for a baby shower, but who wouldn't like to get a handmade washcloth lollipop in a spa basket! I will try to make the candy version next week to show. I might do it with my washcloth soap savers.

Watch for a better photo with a professional set up!

Do you have any neat product packaging?
Sarah