Showing posts with label Fall. Show all posts

Thursday, October 23, 2014

What I am working on....

Despite a few hours in the hospital this morning where I witnessed my nephew being born, I have accomplished a few things for a photo shoot on Monday. It was completely unplanned. You know how that goes. I am left here scrambling and crocheting my little fingers off to try and get things accomplished for Monday.

I will be quite honest. I did not have much of a plan in place. He was born during fall. It is my favorite season. It also is my birthday season, so I chose a "fall" type scene. Who doesn't love fall leaves, pumpkins, and pine cones? Well, my goal tonight was to try and get started once I decided the theme.

What I accomplished in the space of a few hours (minus the bit I took to cook) wasn't as much as I wanted, but it was a start. I could always wait a few weeks to take pictures, but I really wanted to newborn phase.

Here are the photos:


The pumpkin pattern can be found here: http://www.ravelry.com/patterns/library/amigurumi-pumpkins

As you can see the pumpkins are not quite finished. I haven't done the stems or leaves. One thing I am not doing though is trying to create the sections with the yarn in the big one. It seems like a lot of work to make a small little yarn needle go through that. If it were a real pumpkin, it would be 2-4 pounds!


The maple leaf pattern: http://www.ravelry.com/patterns/library/maple-leaf-8
The Elm leaf pattern: http://www.fiberfluxblog.com/2014/10/free-crochet-patternone-round-fall.html

Okay...I will admit. The Elm leaf pattern snagged my attention because it said one round. The designer has two other types of leaves, but it was so tiny that I would have to make TONS to do what I want even with a size H hook. 

The maple leaf pattern though...oh it's perfect! It works up super quick. I did have to keep reading the pattern, but after a few of these I might begin to remember it. As you can see from the following photos, I am doing them in orange (carrot) and green (medium thyme) for now. My plans are to crochet them in burgundy and a medium brown.


If you are planning a fall scene, please use these patterns! They are all quick and easy for a beginner. And let's face it, they would look darn cute on a Thanksgiving table!

Happy Crafting!
Sarah

Monday, April 28, 2014

Make It Monday - 2 Autumn Cards

Were you excited when you saw the preview on Saturday? I couldn't believe how cute they turned out. I plan on sharing another card I made using a Jack N Jill set soon. The goal of my Make it Mondays is simply to work on increasing my stock or other business ventures for the upcoming fair/sale season. Feel free to use the search bar to the right to search for my previous Make it Monday posts.

Before I go any further, please be aware that I am not a professional card maker. I am not a consultant. I make cards because I like to and as a beginner. This tutorial is at a beginner level.

This week is 2 in one! Yep, using the same stamps and same paper I am creating two different looks. Here's the preview: 


Material List
  • White cardstock
  • Brown cardstock
  • Cream cardstock
  • Colorbok Luxe Designer Paper
  • Jack N Jill Stamp set - by Prima Marketing
  • Autumn Sentiment stamp set - by Inkadinkado
  • StazOn Ink pad in Timber Brown
  • Tim Holtz Distress Ink pad in Walnut Stain
  • Pop Dots
  • Snail glue - or whatever adhesive you want to use
  • Gold Glitter Ribbon
  • Scotch tape

As you can see in the photo above, there are two different sizes of cards. I will post the dimensions for each card.

Card one - Side Open
Dimensions of card cut and folded - 5 1/2 x 4
Mat in brown - 5 1/4 x 3 3/4
Designer paper mat - 5 x 3 1/2
(This card was cut in half on the long side. Almost, I do not have a cutter that breaks down further than 1/4.)

Card two - Top Open
Dimensions of card cut and folded - 5 1/2 x 4 1/4
Mat in brown - 5 1/4 x 4
Designer paper mat - 5 x 3 3/4
(This card was cut in half on the short side.)

Stamp Mats In brown
For Jill - 3 1/4 x 1 1/2
Sentiment - 1 1/4 x 2 1/2

Stamp Mats in cream
For Jill - 3 x 1 1/4
Sentiment - 1 x 2 1/4

First, I gathered all the materials together so I did not have to struggle to find something. I cut the cards and mats at the same time. 

*Note: My cutter is a little weird and leaves fibers on the sides of the cuts, so I trim when I see issues. My dimensions do change when I trim. 


After cutting the mats, Cut the ribbon and used two pieces of tape and attached the ribbon to the side open card.


You can see how I accomplished that in this photo.


Add the designer paper to the brown cardstock mats by using snail glue.

Not pictured: Stamp the images to the cream cardstock and attached them with snail glue to their respective mats.


In this photo, I was attempting to figure out where I wanted the images to sit. You can change the layout to fit what you want.


Attach the backings to the card base.


Add pop dots to each of the stamped images.


Place them in the correct position.


Stamp a secondary sentiment inside the card. This is optional, but I think it matches the card.


I did not notice until afterwards that the sentiment inside matches the choice of ribbon, but it goes well together!


What do you think of this week's Make it Monday?

Card making is so versatile! I found it easy to create two similar cards with one set of materials. Yet, they look different and appeal to a different set of people. I would love to see any photos or creations you make from this tutorial. You can share them via email at smchatton.writer@gmail.com or on my Facebook page - https://www.facebook.com/DandeCreations. Who knows! You may find your creation (with your permission of course) on the Share it Saturday post.

Happy Crafting!
Sarah

Saturday, April 26, 2014

Preview - Make it Monday

Well, Monday is almost upon us and that means another "Make it Monday!" This week, I had to think of what I could use around the house to make something that would be useful for my upcoming fair/sale season. As I have been really interested in making a) cards, b) crochet, or c) wooden sleds, I decided to choose A for the upcoming Monday. So, for the first time I am posting a semi-okay card tutorial - on Monday of course. Today, I am just providing a quick preview.


Aren't they just cute? I just purchased both of these stamp sets on Ebay and couldn't wait to try them. For the longest time, the only sentiment sets I had were Christmas. I am very glad to now have some new Autumn type sentiments. Also, look at the little girl! She is part of the Jack and Jill line. I just found it and fell in love immediately.

(Forgot to post when published)

Materials List

  • white cardstock
  • brown cardstock - mat
  • Colorbok Luxe Designer Paper
  • Jack N Jill Stamp set - Prima Marketing
  • Autumn Sentiment - Inkadinkado
  • Cream cardstock
  • StazOn Timber Brown Ink pad
  • Tim Holtz Distress Ink in Walnut Stain
  • Pop dots
  • Snail adhesive (or whatever you want to use)
  • Gold glitter ribbon
  • Scotch tape


Have a wonderful day!
Sarah

Friday, April 18, 2014

Some New Cards

With a week off, I have been attempting to get a little bit of everything done. I am watching my seedlings grow. Working on the containers that are out on the porch. But the best thing I have done this week is work more on my products for Fall. I have a project to show you tomorrow that is particularly fun. For today, I just want to share some of the cards I came up with this week. Yes, some of them will have similar stamps. There happens to be two or three I really love.


I have gotten a few new toys including a cloud embossing folder. So far, I have only made one or two designs with it. I plan to add more. I also have four stamp sets on the way including a cute little Jack and Jill combo that might become my favorite stamps. I cannot wait to try them.

The goal this week is using leftovers and scraps to make cards. In the space of just a little bit, I have a stack of scrap paper really high! They are turning out nicely I think.

Have a great Friday!
Sarah

Monday, April 14, 2014

Bonus Make it Monday: Washcloth Bunnies

Because it is close to Easter and I know that some of us crafters *cough me cough* sometimes wait until the last minute to crochet gifts (shifty eyes), I wanted to provide a bonus Make it Monday. Like the washcloth lollipop, you will need a washcloth, cello bags, and ribbon! No dowels.


Of course, the one I chose is in baby print. It's a 6x6. That is the size I do for child size washcloths.


Roll from one corner to the opposite corner


It will look like this.


Now turn it over so the corner is closest to you. 


As you can see in this picture, you fold the washcloth in half. The corner is poking out the back like a tail!


Here's the front. Carefully wrap yarn or ribbon around the halved washcloth and tie tightly. 


You have ears and a cute little bunny shape!


Turned over, the corner looks like a tail.


Here it is packaged in a cello bag.


With the lollipop!


Total for this project

$0.50 for the washcloth
$0.02 ribbon
$0.04 Cello bag
_______

$0.56

In less than 30 minutes I crocheted the washcloth using half double crochet with a single crochet border. This will work with purchased washcloths so do not let the crochet stop you! Obviously if you buy washcloths the price will rise.

Can you imagine these hopping into your baby's Easter basket?

Happy Crafting
Sarah

Make it Monday: Washcloth Lollipops

Originally, I was going to build a riser for my booth that would hold soap or my dolls. With such a busy week, I did not have the time to get the required material - which is more foam board. But, I found something to make for Make it Monday.

One day last week I saw a cute gift idea on a diaper cake. Two of my sisters are pregnant right now which had me wondering about baby shower gifts. It was this cute lollipop with some type of cloth. When I focused on it, I found that it was a washcloth lollipop. Well, I had no clue how to accomplish this. I looked on youtube and found a good video that showed me how to accomplish this lollipop and a "hard" candy.

Since we are adding soap and other beauty products to our booth, we are also increasing the washcloths and other spa items as well. A surplus of washcloths means a new, cute type of product display.

My goal today is to create some washcloth lollipops to display in my booth in Fall. I spent the last two days crocheting (and paper crafting) a few washcloths to try with this.

What you will need:

Washcloths
Wooden dowels
Ribbon
Cello/Treat bags


2 washcloths
Green is my Star Stitched Washcloth pattern 6x6
Pastel is in Baby Print and just a single crochet at 8.5 x 8.5


Shaped Cello Bags
6 inch wooden dowels
*I bought 12 inch as well and probably would have preferred it to these*


Roll up the washcloth.
The tutorial showed corner to corner, but with a crocheted washcloth that was too much bulk to swirl. 


Swirling the washcloth


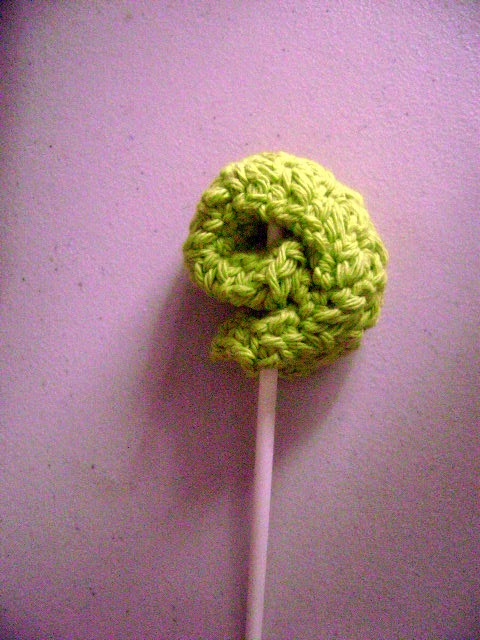
Finished swirling


Insert dowel


Put in cello bag


Repeat with other washcloth


Finished swirl


Finished with ribbon and in bags

I will readily admit that taking photos of this was difficult. So I gathered my hubby up and made him take photos...with a sweet smile on my face of course!

The project is not only really quick, but cheap. I am pretty sure the bag of cello bags was $3.50 at Walmart for 100. The ribbon was only $0.49. The wooden dowels were around $2.00 and that is rounding up. The yarn was only $1 dollar a skein, but I can get multiple out of each skein so roughly $0.50.


Total per washcloth lollipop

$0.04 cello bag
$0.01 ribbon (probably less than that)
$0.10 wooden dowel (Rounded up)
$0.50 washcloth handmade
______

$0.65 PER washcloth

Not only is this a cute gift to give for a baby shower, but who wouldn't like to get a handmade washcloth lollipop in a spa basket! I will try to make the candy version next week to show. I might do it with my washcloth soap savers.

Watch for a better photo with a professional set up!

Do you have any neat product packaging?
Sarah
Sunday, April 13, 2014

Busy! Busy!

On my usual errand day, I picked up two new packs of designer papers for paper crafting. I knew I needed to add some new cards to my stock. There was a good 50+; however, I wanted to spent time with new knowledge and ideas to create a better set of cards. For the past few days, I have been crafting up a storm. Here's a preview:


It is my hope to get as much stock built as I can before fall...including my cards.

What do you think? Any suggestions?
Sarah