Showing posts with label paper bookmark. Show all posts

Saturday, January 24, 2015

Another Scrappy Saturday - Ribbon and Bookmarks - Photo Heavy

Okay! You may have noticed that I have been making a lot of bookmarks in the last few months. *shifty eyes* I do not have a problem. I promise. LOL! But, I do have a lot of nieces, nephews, sisters, cousins, and such who love to read and who I needed to make gifts for. This week's bookmarks made on Monday were lacking the ribbon part. So I wanted to use some scrap ribbon to add some.

On one trip to my local Dollar Tree, I found some beautiful gossamer pink ribbon. It sparkles! It was the closest color I could find in my stash that relatively matched the color scheme of the tie-dyed bookmarks. So I decided to give it a try. Here's a quick tutorial on adding ribbon to your bookmarks.

*Note* This post contains a sneak peak into next week's Scrappy Saturday project!

Materials
Finished bookmark
Hole punch (standard size)
Ribbon


1. Punch a hole near the top of the bookmark. In the photo below, you can see that I punched one slightly higher than the other. I found that it looked better in the end product, but both still look really good.


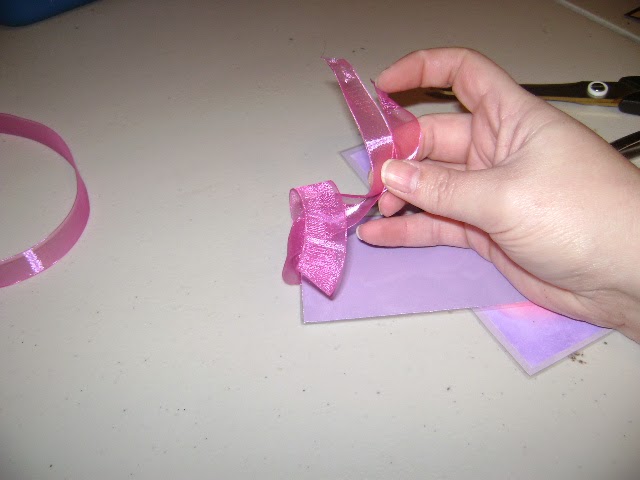
2. Take ribbon and fold it in half. With the ends, fold them in half and half again. It should be able to fit into the hole.


3. Insert the ribbon into the hole from the back of the bookmark.


4. Pull the ribbon until half of both ends are on each side.


5. Insert the ends of the ribbon through the loop.


6. Now pull tight. Cut the ribbon to a shorter length if you wish.


Here's the finished product. Two bookmarks with gossamer ribbon for my two older nieces.


Now that you have a tutorial on how to add ribbon to your bookmarks, you can effectively add ribbon to any project similar to this.

Wishing you a happy crafting day,
Sarah

Monday, January 19, 2015

Make it Monday - National Book Week - Photo Heavy

This week is National Book Week. I chose to showcase this wonderful event because supporting literature, reading, and literacy is important to me. Reading and literature cultivates society to openness, caring, and compassion. Above that, it can teleport you to another world and provides a view from a different angle. What better way to celebrate books and literature than by creating a bookmark? Besides reading a book of course.

Bookmarks are versatile whether made with yarn, thread, or paper. For this project, I am using paper. I am using a technique that you have seen on this blog and will see in the future - pigment ink daubing. I am sure there is another term for that. I don't mind making up names for things!

Materials
Paper cutter or scissors
Ruler
Pen (if you don't use a paper cutter with a ruler attached)
One main color (backing)
A sheet of white card stock
A small section of ribbon (optional)
A laminator
A laminator sheet
A hole punch
Sponge Daubers
Pigment ink
A stamp if you want that
StazOn Jet Black ink (for stamp)
Acrylic block (for stamp)

Here's a picture of the daubers, stamp, and ink I used:


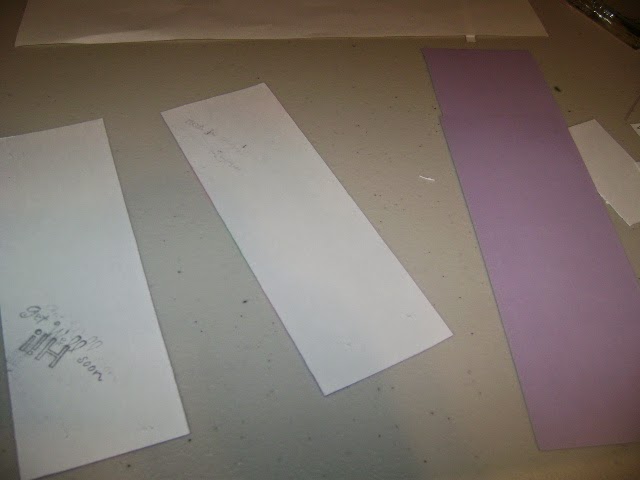
1. What you do first is cut two your base layer at 6 1/4 x 2 1/4. I used a light purple. This is not pictured; however, you can see the cut pieces further below. 

2. Next, cut two white pieces of card stock at 6 x 2. Adhere with temporary tape to a piece of white paper. You can alternatively just hold the piece of paper. This is what I do. 

3. Using the pigment ink and the sponge daubers, pick a color and begin moving in a circular motion in the spot you want. I usually choose the corners. My first color is purple. Pictured below.


4. Pick another color and do the same, but blend the color into the previous one. My second color is pink.


Here's a picture of picking up ink using the dauber.


5. Pick a third color (if you wish) and do the same as step 4. I chose blue and green to mix giving it a pale teal look.


And the 2nd layer is finished.


6. Cut two pieces of white card stock at 3 x 1 3/4. (Or, measure one to fit the stamp you use.) This measurement is for the flower stamp. If you are interested, I found this stamp at JoAnn's online and had it shipped to my house

7. With StazOn Jet Black ink, stamp the image onto both pieces of cardstock.


 8. Now, adhere the stamped images onto the 2nd layer by using tape. This is a Scotch Tape glider. I chose to place mine in the middle and at the top.


9. Attach tape to the back of the 2nd layer and attach them to the base color.  (Here's the purple base layers.)


10. When you have finished, send them through a laminator following the instructions provided by the machine. If you want to add ribbon, punch a hole into the top of the card after laminating and add ribbon. I chose not to do so at this time, but may add some ribbon when I find the right one.


From Dande Creations, I wish you a happy National Book week and urge you to get lost in a book after you finish crafting some bookmarks!

Wednesday, December 17, 2014

Another Scrappy Project - Bookmarks 3

I feel this may become a theme in 2015 - Another Scrappy Project. It seems like an amazing concept that takes scraps and turns them into new items. So......

Oh yes, bookmarks. Number 3. LOL!

What I found interesting about this bunch is that I used the same background color. I took one piece of cream colored 8.5 by 11 paper and cut it in half long ways. That meant the paper was 4 1/4 by 11. I then cut each length into 2 inch pieces of paper. That made 10 bookmark size pieces.

The scrap paper I cut into 4 x 1 3/4 to fit. That gave a small clearance of 1/4 on all sides in most cases. Some I cut down to stamp. Here's the photos:


The green chevron paper did NOT want to be photographed. 


As you can see, the Thinking of You stamp has scrap paper a little shorter to allow for stamping directly on the base paper.


What would you like to see done with scraps? I am planning on doing a section with crochet and other such crafts. This new theme and concept will not be just paper crafts!

Sarah