Showing posts with label products. Show all posts

Thursday, May 29, 2014

Throwback Thursday - Reading what?

Hello friends!

Today is the day that I share some exploits of the past...and by exploits, I mean craft/crochet that I did. In the coming weeks, I am going to share some of my "firsts." By that, I mean that I am going to share with you the first time I completed a certain type of item. The horrible, the improved, and the best, in essence.

This week's share: My first designed kindle cover - Love Themed


I created this cover around Valentine's day as a product in my Etsy shop. It was never purchased. I am thinking about creating the pattern to sell on my Ravelry and Craftsy pattern stores. I have some ideas for a technology set. We shall see how that goes.


What was your first cover like?
Sarah

Sunday, May 25, 2014

It's been three weeks since my last......blog post....lol

You know those moments in time where you are so busy that you can hardly see straight and the stress is almost too much to take? Well, that has been me in the last three weeks. I had an unfortunate encounter with a woman bent on making my life horrible for the last three weeks. Don't worry. I am not going to vent here! I just wanted to clarify. I am in college, attempting to get a BA in English. I am just 3 classes away from finishing. So you can imagine my frustration at being teamed up with someone who cares little for anyone but herself.

Now that I am finally rid of her, I can get back to my stress-free programming! I.E. pattern making, preparing for autumn craft fairs, crocheting, and my writing. It has been too stressful to even think about any of that.

If you notice, I did a Share it Saturday late last night to show what I was up to - now free from stressful, uncaring people.

What I really am up to is something very tedious, but necessary. Any crafter who attempts to sell their product will understand. Since I had the opportunity to join a juried show with my crochet with shows in November and December, I thought I would do ornaments.

1. I LOVE crocheting ornaments.
2. I LOVE Christmas.
3. I LOVE imagining my ornaments on other people's tree or given as gifts.
4. It is extremely easy to decorate a booth for Christmas.

What more could I ask for?

So, tonight I am doing two things - making a list of ornaments that I could potentially make and making them while timing myself.

Timing myself, you ask?

Yep! Timing myself. I am not the type of crafter (anymore) who wants to forget the time aspect of crochet. I believe that there are many undervalued crochet products being sold with no one the wiser. 3x the cost of the material is okay for someone who just randomly sells things; however, for someone wanting to be in a juried show that requires true value, no sales, and representing the actual product - well it is not okay.

This is my formula.

7.25 (federally mandated minimum wage in the U.S.) (divided) / how many I can make in an hour = total for just 1 of those items.

Total of 1 item + (material costs x 3) + packaging costs + taxes = true value of the item

Take the pine cone for example. The small version allows me to get 4 done in an hour. When dividing 7.25 by 4, I get $1.81 for making them just as a wage. I have not weighed the item or found the proper packaging, but I can assume that my price would be between 5-8 dollars per pine cone.

That is the true value. That is what my work is worth. And that is an uncompromising price and value for my work.

As you can see, it is a busy evening and week for myself. I hope that you are still around to view more future posts.

Sarah

Monday, April 28, 2014

Make It Monday - 2 Autumn Cards

Were you excited when you saw the preview on Saturday? I couldn't believe how cute they turned out. I plan on sharing another card I made using a Jack N Jill set soon. The goal of my Make it Mondays is simply to work on increasing my stock or other business ventures for the upcoming fair/sale season. Feel free to use the search bar to the right to search for my previous Make it Monday posts.

Before I go any further, please be aware that I am not a professional card maker. I am not a consultant. I make cards because I like to and as a beginner. This tutorial is at a beginner level.

This week is 2 in one! Yep, using the same stamps and same paper I am creating two different looks. Here's the preview: 


Material List
  • White cardstock
  • Brown cardstock
  • Cream cardstock
  • Colorbok Luxe Designer Paper
  • Jack N Jill Stamp set - by Prima Marketing
  • Autumn Sentiment stamp set - by Inkadinkado
  • StazOn Ink pad in Timber Brown
  • Tim Holtz Distress Ink pad in Walnut Stain
  • Pop Dots
  • Snail glue - or whatever adhesive you want to use
  • Gold Glitter Ribbon
  • Scotch tape

As you can see in the photo above, there are two different sizes of cards. I will post the dimensions for each card.

Card one - Side Open
Dimensions of card cut and folded - 5 1/2 x 4
Mat in brown - 5 1/4 x 3 3/4
Designer paper mat - 5 x 3 1/2
(This card was cut in half on the long side. Almost, I do not have a cutter that breaks down further than 1/4.)

Card two - Top Open
Dimensions of card cut and folded - 5 1/2 x 4 1/4
Mat in brown - 5 1/4 x 4
Designer paper mat - 5 x 3 3/4
(This card was cut in half on the short side.)

Stamp Mats In brown
For Jill - 3 1/4 x 1 1/2
Sentiment - 1 1/4 x 2 1/2

Stamp Mats in cream
For Jill - 3 x 1 1/4
Sentiment - 1 x 2 1/4

First, I gathered all the materials together so I did not have to struggle to find something. I cut the cards and mats at the same time. 

*Note: My cutter is a little weird and leaves fibers on the sides of the cuts, so I trim when I see issues. My dimensions do change when I trim. 


After cutting the mats, Cut the ribbon and used two pieces of tape and attached the ribbon to the side open card.


You can see how I accomplished that in this photo.


Add the designer paper to the brown cardstock mats by using snail glue.

Not pictured: Stamp the images to the cream cardstock and attached them with snail glue to their respective mats.


In this photo, I was attempting to figure out where I wanted the images to sit. You can change the layout to fit what you want.


Attach the backings to the card base.


Add pop dots to each of the stamped images.


Place them in the correct position.


Stamp a secondary sentiment inside the card. This is optional, but I think it matches the card.


I did not notice until afterwards that the sentiment inside matches the choice of ribbon, but it goes well together!


What do you think of this week's Make it Monday?

Card making is so versatile! I found it easy to create two similar cards with one set of materials. Yet, they look different and appeal to a different set of people. I would love to see any photos or creations you make from this tutorial. You can share them via email at smchatton.writer@gmail.com or on my Facebook page - https://www.facebook.com/DandeCreations. Who knows! You may find your creation (with your permission of course) on the Share it Saturday post.

Happy Crafting!
Sarah

Saturday, April 19, 2014

Share it Saturday - Upcoming project

This week I thought I would give a preview of what I will be doing for my next Make it Monday project. I saw this idea on Pinterest recently and wanted to give it a try. For a few years, I have been a big supporter of giving ornaments for Christmas. Last year I gave mittens and my Medallion ornament to most of my family members as a handmade sentiment for the season. This year, I do have similar plans to provide handmade ornaments; however, I have not decided quite what I want to do.

As I prepare for Fall, I know that I need and want to add Christmas ornaments to the roster. (The list gets longer each day.) When I saw this pin, I thought...well that is a relatively easy project that looks adorable in the tree. So, I tried it. The pin did not include a tutorial as the blog just contained multiple pictures. So going with a rough idea, I created a cute version.

Here's the preview!


Can you guess what it is?

Now, I wanted to provide a material list.


  • glue gun
  • glue sticks
  • popsicle sticks - at least 9 (8 for sled and 1 just in case)
  • scissors
  • paint of choice - I am going to use some brown I have sitting aside
  • paint brush
  • scrap paper or newspaper
  • twine/yarn/ribbon

I have not decided what I am going to use for hanging, but I will decide before Monday. One thing I have seen is that this project is easily transformed so children can join in. Instead of hot glue, you could use Elmer's or similar glue. The drying time would just be greater.

The goal for me was a quick, simple project that make a good end product and obviously, a great ornament. I hope you visit on Monday to see how to put this together!

What are your crafting plans this weekend?
Sarah

Monday, April 14, 2014

Bonus Make it Monday: Washcloth Bunnies

Because it is close to Easter and I know that some of us crafters *cough me cough* sometimes wait until the last minute to crochet gifts (shifty eyes), I wanted to provide a bonus Make it Monday. Like the washcloth lollipop, you will need a washcloth, cello bags, and ribbon! No dowels.


Of course, the one I chose is in baby print. It's a 6x6. That is the size I do for child size washcloths.


Roll from one corner to the opposite corner


It will look like this.


Now turn it over so the corner is closest to you. 


As you can see in this picture, you fold the washcloth in half. The corner is poking out the back like a tail!


Here's the front. Carefully wrap yarn or ribbon around the halved washcloth and tie tightly. 


You have ears and a cute little bunny shape!


Turned over, the corner looks like a tail.


Here it is packaged in a cello bag.


With the lollipop!


Total for this project

$0.50 for the washcloth
$0.02 ribbon
$0.04 Cello bag
_______

$0.56

In less than 30 minutes I crocheted the washcloth using half double crochet with a single crochet border. This will work with purchased washcloths so do not let the crochet stop you! Obviously if you buy washcloths the price will rise.

Can you imagine these hopping into your baby's Easter basket?

Happy Crafting
Sarah

Friday, April 11, 2014

Preparing for the Fall

Unless you are a crafter who participates in craft fairs, you may not realize the amount of work that happens or that is necessary to fully prepare for a fair. Sometimes there is so little time between each fair that stock is almost impossible. So, this crafter has began working on stock items.

Last year, I chose to start making paper cards to add to my stock. The first few were very not that great; however, I would like to say that I feel like I am slowly getting better at making cards. This morning I purchased two new paper books that are pretty fantastic. I spent time making 8 cards to include in my fall booth that I wanted to share.

Please know that I am not a professional card maker. I do it because I enjoy it, but I am still learning.


Minus the solid colored paper, the rest of the paper was purchased this morning! I LOVE these. I assure you that they look better in person.

Do you papercraft?
What do you think?
Sarah

Monday, April 7, 2014

Make it Monday: Photo box

One of the  things that is time consuming in a crochet (or any hobby business) is setting up and taking photographs. As I mentioned previously, I am in the process of retaking photos and remaking items so that I can create better photos. The little Easter set-up for Barbie was not as difficult to make; however, it was time consuming taking multiple photos of one item, hoping the light was right, struggling to get the Barbie to stand right...you name it, it took forever.

While I am happy with the way that particular set of photos turned out, I wanted to create a space that was specifically for photographs with a white background and bright lights. Ultimately, I wanted no distractions and a bright pop for my items.

As I was searching for blueprints for a wooden photo box, I came across a bit of a cheaper version. You can view the instructions here. That was up my alley! Cheap, easily made, and did not require large tools that I would have to borrow. So, my goal for Monday is to pick up two desk lamps and some foam board to make this.

My budget: 30 dollars

Here's the breakdown

Foam board: $1.00 a piece
Total: $5.00
-Found at my local Dollar General

Razor cutter: $0.00
I have three at home.

2 Desk Lamps: $10.97
-Found at Walmart. One of which was in clearance for $5.00 and a clip-on for $5.97.

Tape: $0.00
-I have a roll of duct tape at my house.

White Printer Paper: $0.00
-Also have (But didn't use, yet)

Digital Camera $0.00
-Have it

As I am the type of girl to read instructions and then take my own path, I chose to use 20 inch measurements and cut 4 of the 5 boards down to that.

This is the 4 out of 5 cut down.

 Then, I started to cut the tape and assemble the pieces edge to edge. Now, with one person this is doable; however, I did start to get frustrated when things started to fall down. I used the wall as a support. When I completed the four out of 5 pieces, I attached the bottom. It helped to stick the tape to the edge of the desk and have it ready.


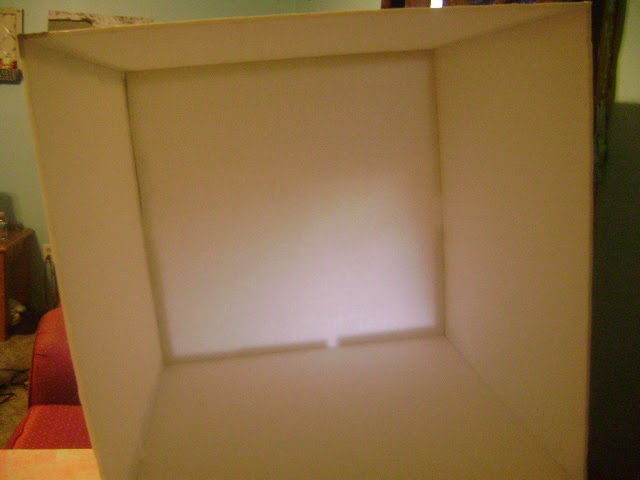
Unlighted and no flash on the cube! You can see the tape.


With the flash, you can no longer see the tape, but you can see the seams.


The finished setup. These are the lamps I found really cheap and on clearance.

I would have to say that I accomplished this box within a hour with minimal frustration. The ease of completing it was pretty nice. As you can see, it is a cheaply made photo box; however, at the price of 5 dollars and a little tape you have a somewhat, well lit photo box. In the next week, I plan on putting something along the seams to fix it.

Now, you know I did not just take a photo of the box and move on! I had to try it on one of my products. I have to say, straight up I would normally have something under this item to lift it up as it photographs better that way. I used every function on my camera (not an expensive one) to take photos and see the results. When I found one that looked good with the lights on, I took it with the lights off and flash. Here are the results:


Without lights/flash, before edit


Without lights, after edit


With Lights/Flash, Before Edit


With Lights/Flash, After Edit


As you can see by these pictures, the clarity on the edited with lights photo is far superior to the others. Even without the lights and with a flash, the clarity and color does not come close to popping like the final picture!

Total Cost without tax: $15.97

If you need a photo box and need one on the cheap, I would highly suggest this type. Note: If you do not have the materials I do, this will cost you more. The box cutter and tape are not that expensive; however, the price will rise when you add other things.

THUMBS UP!

What do you think of the photo box?
Are you going to try to make one?
Sarah