Sunday, April 13, 2014

Inky Rainbows

A few months ago when I decided to try paper crafting, I found a technique I was interested in trying. It involved pigment ink, a dauber, a white wax crayon, a stamp, and a piece of white card stock. The idea was that you stamped a certain image onto the white card stock and used the white crayon to cover up the area you did not want colored. I tried with an owl stamp. I covered up the face and began rubbing the stamp with purple and yellow ink. I found that the ink did not quite work as well as I thought. The purple bled and the yellow did not.

What I realized is that I REALLY enjoy the technique without using the crayon. I began experimenting with just a piece of white card stock and pigment ink. The result was a great, bright background. Here's some examples:


If you would like a photo tutorial, let me know!

Do you have any unique techniques involving ink?
Sarah

Busy! Busy!

On my usual errand day, I picked up two new packs of designer papers for paper crafting. I knew I needed to add some new cards to my stock. There was a good 50+; however, I wanted to spent time with new knowledge and ideas to create a better set of cards. For the past few days, I have been crafting up a storm. Here's a preview:


It is my hope to get as much stock built as I can before fall...including my cards.

What do you think? Any suggestions?
Sarah

Friday, April 11, 2014

Preparing for the Fall

Unless you are a crafter who participates in craft fairs, you may not realize the amount of work that happens or that is necessary to fully prepare for a fair. Sometimes there is so little time between each fair that stock is almost impossible. So, this crafter has began working on stock items.

Last year, I chose to start making paper cards to add to my stock. The first few were very not that great; however, I would like to say that I feel like I am slowly getting better at making cards. This morning I purchased two new paper books that are pretty fantastic. I spent time making 8 cards to include in my fall booth that I wanted to share.

Please know that I am not a professional card maker. I do it because I enjoy it, but I am still learning.


Minus the solid colored paper, the rest of the paper was purchased this morning! I LOVE these. I assure you that they look better in person.

Do you papercraft?
What do you think?
Sarah

Thursday, April 10, 2014

Throwback Thursday

It is that time of the week where I get to show an early picture or something as a throwback to older times! This week's throwback photo is:


Dolly

This was my second or third doll. It was for a friend's daughter who wanted a doll. It was relatively easy to crochet, but it took a while. Of course, looking at it 3 years later I know that I could and would change things like the eyes, the hair, and add more stuffing.

The important thing is...the little girl liked it. So I was happy!

Thanks for going back with me
Sarah

Wednesday, April 9, 2014

What am I working on....

We made the decision to try to sell this fall at our local market and start working on building up stock to participate in future craft fairs. So this morning, I went through what I had already made and packaged to make a list of what I need to make. Anyone who has done this knows how daunting it can be - the inventory and the lack of inventory.

Yes, I know it is April. But, I started working on Fall/Christmas stock because some of them are a) easy to make, b) great in between project fillers, and c) a little elaborate. Yesterday, I posted that I was struggling with what to do next, so I started on something I enjoy - ornaments. My goal is a bit on the larger side, but that's okay. Better to shoot for the moon than shoot for just a few feet in the air.

I wanted to start small because it was late in the night. This is what I did last night:

Christmas Stocking Ornament in Dark Orchid

This morning, after inventory I chose to do my own pattern - Medallion Christmas Ornaments. I ended up developing two other sizes, which I might release as a e-book closer to Christmas! Today, I do not plan on actually creating the medallions by sewing them together. I am just making the sides. I've gotten 4 sets of sides done so far - with many interruptions!


Aren't they lovely? The coloring is off, but they are red and green. I plan on making many colors and having some for purchase in my Etsy shop closer to Christmas.

What are you working on today?
Sarah

Tuesday, April 8, 2014

A Quiet Day here

As night has just come for us here in East TN, I am listening to the sounds of the bugs and enjoying the peaceful feeling one can have at the end of a day. Today was quite different than yesterday. There was no scrambling around. No errands. No preparing projects or seeds. There was no shoveling dirt or cutting my finger on rocks. No traffic except for the occasional car heading home. Just a chill in the air, bugs singing their songs, and a crafter contemplating her next project.

It was a peaceful day and evening. In this day and age, it is difficult to imagine someone having a day like this...or the very simple truth of realizing the day, enjoying it, and being thankful. Yet, here I am tonight enjoying it.

For a crocheter, not picking up her hook in a day seems like a hypocritical move. It's like a human needs air, so shall a crocheter need yarn and her hook. This comes a day after buying 6 new skeins of yarn - 5 of which are beautiful and "Spring-y."

One issue I seem to be having is making decisions regarding the selling of my products. For months I have been struggling with whether I should or should not sell. Anyone who has faced this decision will tell you - it sure is a difficult decision. I live in a very crafty-artsy area. There are many different types of artists within 20 miles of my location and a huge stretch of road that loops back to Gatlinburg with tons of these artist's workshops and shops!

How does one compete with that? Correction: How does someone like me, with no workshop or shop, compete with individuals who have been working years on their brands, their shops, and building their workshops up with the best equipment?

Well...I can't! That is what got me down. I sold my tent. I sold my big table. And all I have is my product, a yellow queen sized sheet, and a 5 foot table. I was down. I was frustrated with myself. And a lot of what was happening was out of my control!

So when I started to see a meme that talked about how long it took to create a brand and build a small business, I started questioning my decisions. Everything around me and everything that was happening seemed to be something else that was building me back up - a video on building brands, other crafters telling me how long and hard they worked, seeing the determination to continue, and repeatedly seeing that meme...in MANY places.

What can one do if all the signs are saying "YOU STOPPED TO EARLY. JUMP BACK ON THE PONY AND RIDE INTO THE WIND?"

Well...you listen of course! So tonight, I am attempting to create a plan to get myself back into the game. We are adding products that have nothing to do with crochet like beauty products and soaps. Maybe candles? Just on a small scale at first. I am not quite sure how it will end...or if I will end up failing again; however, I do know that like all the great little businesses out there who have carved a name for themselves, I will continue to fail until I succeed!

Wishing you success (even after repeated failures)
Sarah 

Monday, April 7, 2014

Make it Monday: Photo box

One of the  things that is time consuming in a crochet (or any hobby business) is setting up and taking photographs. As I mentioned previously, I am in the process of retaking photos and remaking items so that I can create better photos. The little Easter set-up for Barbie was not as difficult to make; however, it was time consuming taking multiple photos of one item, hoping the light was right, struggling to get the Barbie to stand right...you name it, it took forever.

While I am happy with the way that particular set of photos turned out, I wanted to create a space that was specifically for photographs with a white background and bright lights. Ultimately, I wanted no distractions and a bright pop for my items.

As I was searching for blueprints for a wooden photo box, I came across a bit of a cheaper version. You can view the instructions here. That was up my alley! Cheap, easily made, and did not require large tools that I would have to borrow. So, my goal for Monday is to pick up two desk lamps and some foam board to make this.

My budget: 30 dollars

Here's the breakdown

Foam board: $1.00 a piece
Total: $5.00
-Found at my local Dollar General

Razor cutter: $0.00
I have three at home.

2 Desk Lamps: $10.97
-Found at Walmart. One of which was in clearance for $5.00 and a clip-on for $5.97.

Tape: $0.00
-I have a roll of duct tape at my house.

White Printer Paper: $0.00
-Also have (But didn't use, yet)

Digital Camera $0.00
-Have it

As I am the type of girl to read instructions and then take my own path, I chose to use 20 inch measurements and cut 4 of the 5 boards down to that.

This is the 4 out of 5 cut down.

 Then, I started to cut the tape and assemble the pieces edge to edge. Now, with one person this is doable; however, I did start to get frustrated when things started to fall down. I used the wall as a support. When I completed the four out of 5 pieces, I attached the bottom. It helped to stick the tape to the edge of the desk and have it ready.


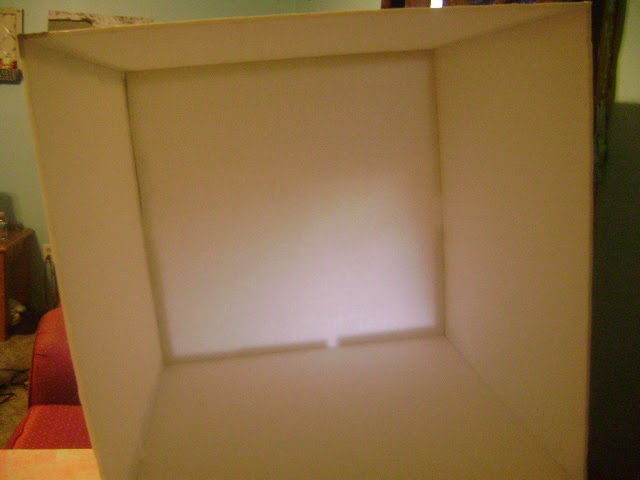
Unlighted and no flash on the cube! You can see the tape.


With the flash, you can no longer see the tape, but you can see the seams.


The finished setup. These are the lamps I found really cheap and on clearance.

I would have to say that I accomplished this box within a hour with minimal frustration. The ease of completing it was pretty nice. As you can see, it is a cheaply made photo box; however, at the price of 5 dollars and a little tape you have a somewhat, well lit photo box. In the next week, I plan on putting something along the seams to fix it.

Now, you know I did not just take a photo of the box and move on! I had to try it on one of my products. I have to say, straight up I would normally have something under this item to lift it up as it photographs better that way. I used every function on my camera (not an expensive one) to take photos and see the results. When I found one that looked good with the lights on, I took it with the lights off and flash. Here are the results:


Without lights/flash, before edit


Without lights, after edit


With Lights/Flash, Before Edit


With Lights/Flash, After Edit


As you can see by these pictures, the clarity on the edited with lights photo is far superior to the others. Even without the lights and with a flash, the clarity and color does not come close to popping like the final picture!

Total Cost without tax: $15.97

If you need a photo box and need one on the cheap, I would highly suggest this type. Note: If you do not have the materials I do, this will cost you more. The box cutter and tape are not that expensive; however, the price will rise when you add other things.

THUMBS UP!

What do you think of the photo box?
Are you going to try to make one?
Sarah