Showing posts with label help with photos. Show all posts

Thursday, November 27, 2014

12 Weeks of Christmas - Week 9

Week 9
Snowflake Ornament


I have mentioned previously that I absolutely love snow and snowmen. I may not like to get out in it, but it's beauty is something to behold every year with a breath of anticipation and reverence. So when I crochet ornaments, one kind I love completing is a snowflake. Who doesn't enjoy snowflakes? Imagine that on your tree...snowflakes covering a green tree, simulating actual snow. Well...maybe not, but you can imagine right?

So this week's pattern comes from a blog called Flower Girl Cottage. It is a quick and simple pattern without much frills. What makes this pattern so great is the versatility it provides. You can use any color you wish (light blue, white, even silver) and still have wonderful snowflakes.

One note before you start the project. Part of the pattern is written incorrectly. The woman of the blog states in the comments that she is not a professional pattern designers, which is more than fine. As I am able to write patterns, I did spot an issue.

Her Pattern: 
Round 1:
Ch 4 (this counts as as hdc, ch 2) Hdc, Ch2 (5 times) into the circle or magic circle


Correction:
Ch 4 (counts as hdc, ch 2), hdc, ch 2 (5 times) sl st to 2nd st in ch 4. This creates 6 clusters.

The only issue was closing the round.


Project Type: Scrap buster

Skill level: Easy/Beginners with a little advanced knowledge about sewing

Hook Size: G or H hook (I used H.)
    Recommended - H, but G will make it slightly smaller.

Type of Yarn: Worsted Weight - I used Red Heart in  White.

Extra requirements:
Scissors
Stitch marker (if you need it)

Uses for finished product

  • embellishment on a present
  • ornament
  • hat embellishment
  • garland

For a hanger: On final sl st, ch 15 and sl st to the same spot. Fasten off and sew in all ends.

Come back on Monday to see the finished product! I would like to wish you all a Happy Thanksgiving here in the U.S. Please have a safe holiday and a holiday weekend. If you do your shopping, be wary of the mass amount of people and kind to others.


Monday, April 7, 2014

Make it Monday: Photo box

One of the  things that is time consuming in a crochet (or any hobby business) is setting up and taking photographs. As I mentioned previously, I am in the process of retaking photos and remaking items so that I can create better photos. The little Easter set-up for Barbie was not as difficult to make; however, it was time consuming taking multiple photos of one item, hoping the light was right, struggling to get the Barbie to stand right...you name it, it took forever.

While I am happy with the way that particular set of photos turned out, I wanted to create a space that was specifically for photographs with a white background and bright lights. Ultimately, I wanted no distractions and a bright pop for my items.

As I was searching for blueprints for a wooden photo box, I came across a bit of a cheaper version. You can view the instructions here. That was up my alley! Cheap, easily made, and did not require large tools that I would have to borrow. So, my goal for Monday is to pick up two desk lamps and some foam board to make this.

My budget: 30 dollars

Here's the breakdown

Foam board: $1.00 a piece
Total: $5.00
-Found at my local Dollar General

Razor cutter: $0.00
I have three at home.

2 Desk Lamps: $10.97
-Found at Walmart. One of which was in clearance for $5.00 and a clip-on for $5.97.

Tape: $0.00
-I have a roll of duct tape at my house.

White Printer Paper: $0.00
-Also have (But didn't use, yet)

Digital Camera $0.00
-Have it

As I am the type of girl to read instructions and then take my own path, I chose to use 20 inch measurements and cut 4 of the 5 boards down to that.

This is the 4 out of 5 cut down.

 Then, I started to cut the tape and assemble the pieces edge to edge. Now, with one person this is doable; however, I did start to get frustrated when things started to fall down. I used the wall as a support. When I completed the four out of 5 pieces, I attached the bottom. It helped to stick the tape to the edge of the desk and have it ready.


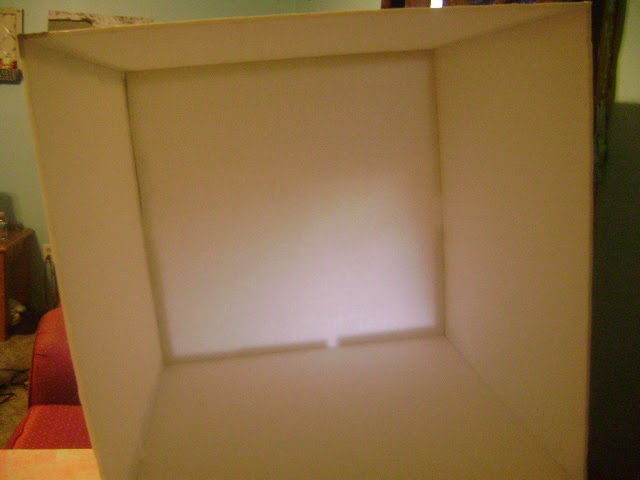
Unlighted and no flash on the cube! You can see the tape.


With the flash, you can no longer see the tape, but you can see the seams.


The finished setup. These are the lamps I found really cheap and on clearance.

I would have to say that I accomplished this box within a hour with minimal frustration. The ease of completing it was pretty nice. As you can see, it is a cheaply made photo box; however, at the price of 5 dollars and a little tape you have a somewhat, well lit photo box. In the next week, I plan on putting something along the seams to fix it.

Now, you know I did not just take a photo of the box and move on! I had to try it on one of my products. I have to say, straight up I would normally have something under this item to lift it up as it photographs better that way. I used every function on my camera (not an expensive one) to take photos and see the results. When I found one that looked good with the lights on, I took it with the lights off and flash. Here are the results:


Without lights/flash, before edit


Without lights, after edit


With Lights/Flash, Before Edit


With Lights/Flash, After Edit


As you can see by these pictures, the clarity on the edited with lights photo is far superior to the others. Even without the lights and with a flash, the clarity and color does not come close to popping like the final picture!

Total Cost without tax: $15.97

If you need a photo box and need one on the cheap, I would highly suggest this type. Note: If you do not have the materials I do, this will cost you more. The box cutter and tape are not that expensive; however, the price will rise when you add other things.

THUMBS UP!

What do you think of the photo box?
Are you going to try to make one?
Sarah