Monday, January 19, 2015

Make it Monday - National Book Week - Photo Heavy

This week is National Book Week. I chose to showcase this wonderful event because supporting literature, reading, and literacy is important to me. Reading and literature cultivates society to openness, caring, and compassion. Above that, it can teleport you to another world and provides a view from a different angle. What better way to celebrate books and literature than by creating a bookmark? Besides reading a book of course.

Bookmarks are versatile whether made with yarn, thread, or paper. For this project, I am using paper. I am using a technique that you have seen on this blog and will see in the future - pigment ink daubing. I am sure there is another term for that. I don't mind making up names for things!

Materials
Paper cutter or scissors
Ruler
Pen (if you don't use a paper cutter with a ruler attached)
One main color (backing)
A sheet of white card stock
A small section of ribbon (optional)
A laminator
A laminator sheet
A hole punch
Sponge Daubers
Pigment ink
A stamp if you want that
StazOn Jet Black ink (for stamp)
Acrylic block (for stamp)

Here's a picture of the daubers, stamp, and ink I used:


1. What you do first is cut two your base layer at 6 1/4 x 2 1/4. I used a light purple. This is not pictured; however, you can see the cut pieces further below. 

2. Next, cut two white pieces of card stock at 6 x 2. Adhere with temporary tape to a piece of white paper. You can alternatively just hold the piece of paper. This is what I do. 

3. Using the pigment ink and the sponge daubers, pick a color and begin moving in a circular motion in the spot you want. I usually choose the corners. My first color is purple. Pictured below.


4. Pick another color and do the same, but blend the color into the previous one. My second color is pink.


Here's a picture of picking up ink using the dauber.


5. Pick a third color (if you wish) and do the same as step 4. I chose blue and green to mix giving it a pale teal look.


And the 2nd layer is finished.


6. Cut two pieces of white card stock at 3 x 1 3/4. (Or, measure one to fit the stamp you use.) This measurement is for the flower stamp. If you are interested, I found this stamp at JoAnn's online and had it shipped to my house

7. With StazOn Jet Black ink, stamp the image onto both pieces of cardstock.


 8. Now, adhere the stamped images onto the 2nd layer by using tape. This is a Scotch Tape glider. I chose to place mine in the middle and at the top.


9. Attach tape to the back of the 2nd layer and attach them to the base color.  (Here's the purple base layers.)
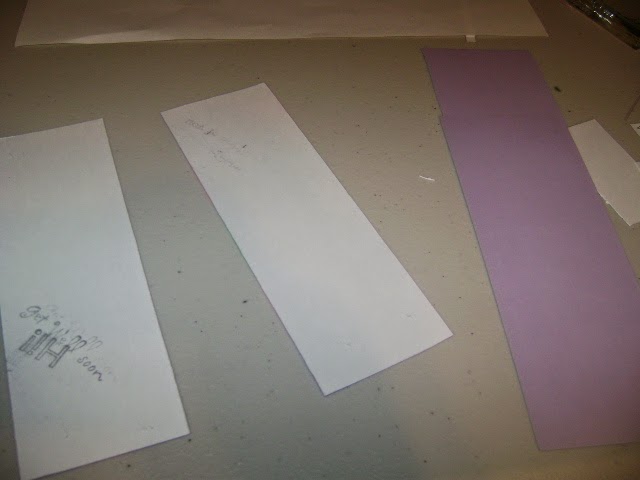

10. When you have finished, send them through a laminator following the instructions provided by the machine. If you want to add ribbon, punch a hole into the top of the card after laminating and add ribbon. I chose not to do so at this time, but may add some ribbon when I find the right one.


From Dande Creations, I wish you a happy National Book week and urge you to get lost in a book after you finish crafting some bookmarks!

Sunday, January 18, 2015

Revealing the Theme - National Book Week

Hello again! It is time for our second reveal week here at Dande Creations. This one is pretty fun and something that holds a lot of room in my heart. This week is National Book week. The essence of this week is to inspire others to read especially young children who are constantly bombarded with too much mind noise. Yep...mind noise! America has become pretty materialistic and full of advertisements. Take a look the next time you drive somewhere. How many advertisements do you see? Or when you watch something on television? These things are so distracting, which makes books a WONDERFUL thing. We can imagine the story with little to no interruption. It's quiet. Above all, it engages our mind.

One of my early childhood memories is how my third grade teacher brought to life the stories of C.S. Lewis. They were magical and made me want to delve deeper into the worlds authors create. So this week, I am dedicating the week to celebrate the National Book week.

This week's Make it Monday utilizes a technique I love. I am not going to tell you what it is. You will have to come back tomorrow and check it out. What I can do is provide a list of the materials for the project and perhaps you can guess.


Materials
Paper cutter or scissors
Ruler
Pen (if you don't use a paper cutter with a ruler attached)
One main color (backing)
A sheet of white card stock
A small section of ribbon (optional)
A laminator
A laminator sheet
A hole punch
Sponge Daubers
Pigment ink
A stamp if you want that
StazOn Jet Black ink (for stamp)
Acrylic block (for stamp)

See you tomorrow crafters,
Sarah

Saturday, January 17, 2015

Another Scrappy Saturday - A Barbie Art Piece - Photo Heavy

Another Scrappy Saturday was an interesting post created in December of 2014 to share with my readers a great use for scraps. Like any crafter, scraps are a by product and either a) take up so much space or b) given away to someone else. My goal in 2015 is to use scraps more frequently to make the most of my money and my materials. The second week of January has the theme of Barbie.

I have spoken previously about not having a craft store less than 50 minutes away from me, so what I have found comes from local stores like Goodwill (great bargains), Walmart (unfortunately), Dollar Tree (great place for ribbon), Lowes (yep), and The Dollar General. We have a small store named Fred's that has a few good deals as well. Because I am somewhat limited in what I can use, it requires me to be a little bit more crafty.

This week's Scrappy Saturday is a Barbie Art for her dream house. Let's face it. Barbie's Dream house when bought in the stores is super expensive. The art inside comes in the form of stickers. It's a little unappealing. For crafters, this is an easy fix!

Because I craft with multiple mediums, I chose to create a piece of art for Barbie's dream house using foam board and designer paper. I have seen multiple printable art pieces for miniature dollhouses, but I choose to use my scraps to make them.

Be forewarned. I did not take any measurements. I slapped it together quickly, but I will show the pictures and how I accomplished them.

Here's the list:


Materials:
Two pieces of foam board
2 way glue for adhering paper (or hot glue if you wish)
Some thread or yarn
6x6 or smaller pieces of designer paper (2)
Scissors

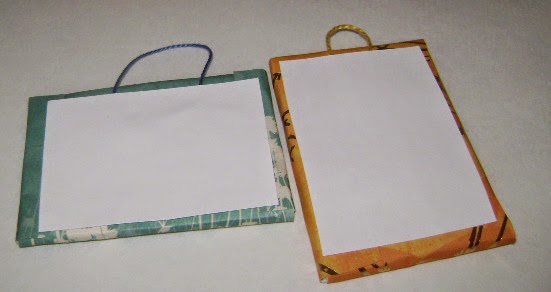
To begin, cut two sizes of foam board with scissors. I didn't worry about getting the shape exact. I got two rectangles. (Not pictured)

Next cut two pieces of designer paper larger than your foam board pieces.


Cut the corners out of the paper. Pictured below. I didn't worry about 90 degree angles.


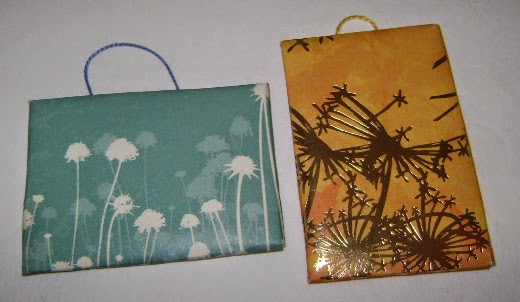
Put glue on the flaps and fold them onto the foam board. Remember to press firmly until the glue adheres. (Not Pictured) Repeat for all four sides.

Next, cut two pieces of white card stock to fit the back and two pieces of string/yarn/ribbon to hang your art pieces.


Place a small dot of glue on the back to hold the thread in place. Place glue on the piece of card stock and center on the back of the art piece and press firmly.


This is how they will look after this step.


And now you have two art pieces to hang on the wall of your Barbie house.


If you are using a wooden Barbie house, you can use some gold or silver thumb tacks to hold them on the wall. These are light weight art pieces that allows you to create any number of pieces to match the decor or personalize your child's play house.

Thursday, January 15, 2015

Throwback Thursday -

I realized early in my crochet pattern designing that I wanted to focus on something I rarely saw - Barbie patterns using larger yarn. The patterns that have been developed by thread crocheters are simply fantastic. If you have not seen any, I suggest you google it. My absolute favorite is Scarlett O'Hara's Green Curtain dress. (Okay, I admit. I am a HUGE Gone With the Wind fan. Sue me.)

I don't own this photo! I found it here.


I thought I would give thread crocheting a try. How hard could it be using the same stitches as normal crochet? Well...apparently MUCH harder than I anticipated. What really bothered me was the smallness of the hook and the slippage of the thread. It was hard to control. I continued to mess up. My hand and wrist was hurting. And I just couldn't take it. I knew after that first try that without some serious intervention I would never be a thread crocheter. So I stuck with what I knew.

A size G hook and Red Heart.

Who needed the end product to be super soft and not itchy? I was absolutely sure that plastic Barbie would have no issue with a scratchy dress. So, I began designing patterns. The first ones were a little horrible. Even my first purses...Well, they could use some updating.

I suggest keeping tuned for that!

Anyway, here is my first Throwback Thursday photo.


My first Barbie purse design

It isn't TOO bad, but it could use some work. You can find it on my blog by searching Barbie Purse with Flap or clicking here.


Monday, January 12, 2015

Make it Monday - A Pillowy Project

Make it Monday was a very popular event in 2014, so I decided to bring it back. It fits SO well with the weekly theme idea I am presenting for 2015 here at Dande Creations. Not only does it provide a central concept, but it provides me with multiple ways to craft in the coming year. I am very much looking forward to it. And I hope you are too.

I announced yesterday that the weekly theme is Barbie. I am sorry for those of you who have boys! I know I tend to create curly, girly, and frilly things here at Dande Creations. I am working to expand my patterns to more types of things. I promise!

To start our week, I am providing a new free pattern to my blog and my pattern stores. The first of many that I plan on releasing in 2015. Like all of my other Barbie patterns, I have not tested them on other 12 inch fashion dolls. I am pretty sure they will not fit on any Monster High dolls. What they do fit on is the belly button Barbies and the old fashioned Barbies. If there is any change or restrictions to the pattern, it will be presented at the start in the notes.

Thankfully, there is NO need to measure Barbie or worry about which one this pattern will fit. It is not even for "dressing" her. It is for her bedroom.

It's..............a pillow!


Yep! In the coming weeks, a full bedroom suite pattern book will be released with this pillow pattern, the pillow slip/case, some accent pillows, a ruffle blanket, and more. I will also include a post with a description of some of the ways to create cheap Barbie beds without having to purchase a set from the store.

*Note* In the future, this pattern will be posted on an individual page that can be accessed by the right navigation panel under the Free Patterns section.

Now, on to the pattern.


Materials
Size G hook
Scissors
Yarn needle
Fiberfil
Small amount of yarn
Stitch marker (optional)

Abbreviation List
st = stitch
sts = stitches
ch = chain
sc = single crochet
sl st = slip stitch

Notes
This is in U.S. terminology.

Pattern
Pillow
(make 2)
Ch 11
Row 1: In 2nd st, sc. Sc across, ch 1, turn (10)
Row 2-7: sc in each st, ch 1, turn (10)
Fasten off

Finishing

Holding two together, sc in each st. Each corner receives (sc, ch 1, sc). When close to finishing, fill with fiberfil. Finish sc. Sl st to beginning sc. Weave in ends. 

Sunday, January 11, 2015

Revealing the Theme - Barbie

Every Sunday in the year of 2015, I will be releasing a post that shows the theme of the week. The projects presented that week will be following that particular theme. It may follow a particular type of craft. It may be on a particular topic. Or it could end up completely random. What is important is that I will be focusing on a few goals this year to make this blog easier to follow. The 12 Weeks of Christmas format in 2014 was an easy to read, follow, and complete format. That is the general idea.

Goal 1
I want to use all my scraps to make the most of my money and my materials.

Goal 2
I want to finish some of the patterns in my arsenal. Some only need to be typed up!

Goal 3
Have at least three posts every week for my blog.


These are not horrible goals. In fact, they are pretty easy to accomplish. Here's how the blog posts will look like.

Sunday - Release of the Weekly Theme
Monday - Make it Monday, where I will go in-depth on the project
Thursday - Throwback Thursday, where pictures of past projects pop up
Saturday - Another Scrappy Saturday, where I use scraps to do a project
Other days - Releases of patterns or deals

Some of these days may have free patterns. Some may be projects seen on other sites. There will be no set project choice for any week.

The first week of the year actually begins today. The theme is one that I have always enjoyed having.

Barbie

Stay tuned to the following week to see what projects come up. I can provide just one small detail. There will be a free pattern this week.

Thursday, January 8, 2015

Throwback Thursday - My First Card Making Adventure.

My card crafting interest was peaked when I first ran across a card maker on Youtube. That card maker was Robin from MyPinkStamper. Her attitude toward card making was engaging for me. So I began watching all of her videos. One of the most paramount products she uses to make cards was the Cricut. When I began becoming serious about trying card making, I purchased a new Cricut on Ebay for a lower price. It was fun to mess with, but my first projects were.....Well, they left a lot to be desired. Here's a quick view of one of my first projects.


What I learned through the first weeks of my card making adventures was that I absolutely loved stamping and designing cards. The Cricut.....not so much. The mat would stop sticking. The machine wouldn't cut all the way through the card stock on 6. It was just horrible. So, my adventures left me with a love of stamping and of making cards.


Do you remember your first adventure in a new craft?
Sarah