Showing posts with label books. Show all posts

Monday, May 18, 2015

Make it Monday - Binding a Book - Photo Heavy

This project was done months in advance because it was created for my mother's birthday. Her birthday falls in December, close to Christmas. We had plans to go out for lunch, but I wanted to make something special for her. Something I took time on. I have the luck to have a mother who truly loves everything homemade or anything given to her. Her humbleness stuns me every time. In recent months, she had told me that she had been studying her religious text. So this Make it Monday project comes from the desire to help her progress.

Yep! I bound a book. Two of them in fact. And I would have to say that they are more along the lines of a booklet. The ones I have made are meant for note taking or other such things. You can obviously create larger books than the ones I completed. All you would need to do is puncture the paper a little at a time to accomplish this. And cut the designer paper larger to cover the added paper.

Materials
Paper cutter
Designer paper or colored paper
4-6 sheets of white copier paper
needle
thread
scissors

Here are the instructions on how to accomplish this project:

1. Take 4-6 sheets of white copier paper and fold them in half. Be sure to press the bent side with a straight edge or a bone folder.


2. Cut the designer paper to 8.5 x 11 to fit over the paper. You can also add 1/4 of an inch on either side to overcompensate. (Excuse my crafter's mess - This was around Christmas time.)


3. Fold the designer paper over the copier paper. Remember to press the seam with a straight edge.


4. Take your threaded needle and puncture the center of the paper from the inside. Leave a longer tail because you will need to tie the ends together.


5. When you bring the needle and thread out, puncture another hole about 2-3 inches away from the center. I went a little further on this one than I did my first one.


6. Take the needle through the paper and back across the center to the opposite side. I didn't measure. I just eyed the space to see what looked right. They are about equal distance from the center. Puncture the paper and pull the needle to the outside of the booklet again.


7. Finally, push the needle through the center hole. Pull tight. Then cut the needle off leaving a long tail to tie.


 8. Tie the two ends together twice and cut a majority of the excess. Fold the booklet.

Congrats! You just made a booklet. Here's the pictures of the two finished booklets I completed. I chose not to embellish them as I knew that my mother would love them, but you can embellish them with ribbon or stamps or whatever you wanted.


These are bookmarks I made to match the booklets.


Booklets and bookmarks together.


Finished and packaged. If you are wondering, I took a 8 x 10 cello bag I purchased from JoAnn's online (with a self adhesive closure), added the booklets and bookmarks, and closed it. I then took a piece of brown cardstock (scrap) and folded it over. I stapled it onto the cello bag. I used a scrap piece of the flower designer paper to cover the staples.


I hope you have found this tutorial informative and choose to do it yourself. It is relatively easy. It was super quick. I was able to accomplish it within ten minutes (minus the bookmark part since I laminated). A bit of that time was trying to thread a needle....because my threader broke. So, you can accomplish this project in less than 10 minutes without a doubt.

Take some time to create some homemade books and bookmarks for someone you care about! The gifts don't have to be expensive, especially when they come from your heart.

Sarah

Sunday, May 17, 2015

Revealing the Theme - National Children's Book Week

From the age of nine, I had a desire to write. It was so important to me that my father suggested I start using the GED book to learn high school and college level words. I spent time studying and writing the words in the dictionary. I would have 10 new words each week. By half way through the year, I wrote a 16 page short story - romance of course. Nervously, I read it to my little sister who sat rapt at each word. I was sitting on the dresser and she was sitting on the bed. I remember feeling enthralled at her response and hoping that she would love the story I had to tell. Yes, had. Within moments of finishing, I waited for the response. When she told me that it was good and she loved it, I breathed a sigh of relief and celebrated internally with jubilation.

That feeling is something all children should have growing up. They should have a safe situation to express their voice even if the words coming out of them is not something we agree with. Sometimes...all someone needs is to be heard.

So, with that in mind...this week's theme is going to focus on the act of writing. One aspect of most lives is literature. I remember creating my own book in fifth grade. It was entitled - Mighty Morphin Spider Rangers. LOL! Yes, after the Power Rangers. It was really huge then. What it did was allow me to use my creativity and mind to create a story I liked.

This week....we are focusing on National Children's Book Week.

But in a different light than one would think we would celebrate. So please join me this week on this blog to focus on Children's book and writing.

Before I finish this post, I will provide a list of the materials needed for tomorrow's Make it Monday.

Materials
Paper cutter
Designer paper or colored paper
4-6 sheets of white copier paper
needle
thread
scissors

Sarah

Monday, January 19, 2015

Make it Monday - National Book Week - Photo Heavy

This week is National Book Week. I chose to showcase this wonderful event because supporting literature, reading, and literacy is important to me. Reading and literature cultivates society to openness, caring, and compassion. Above that, it can teleport you to another world and provides a view from a different angle. What better way to celebrate books and literature than by creating a bookmark? Besides reading a book of course.

Bookmarks are versatile whether made with yarn, thread, or paper. For this project, I am using paper. I am using a technique that you have seen on this blog and will see in the future - pigment ink daubing. I am sure there is another term for that. I don't mind making up names for things!

Materials
Paper cutter or scissors
Ruler
Pen (if you don't use a paper cutter with a ruler attached)
One main color (backing)
A sheet of white card stock
A small section of ribbon (optional)
A laminator
A laminator sheet
A hole punch
Sponge Daubers
Pigment ink
A stamp if you want that
StazOn Jet Black ink (for stamp)
Acrylic block (for stamp)

Here's a picture of the daubers, stamp, and ink I used:


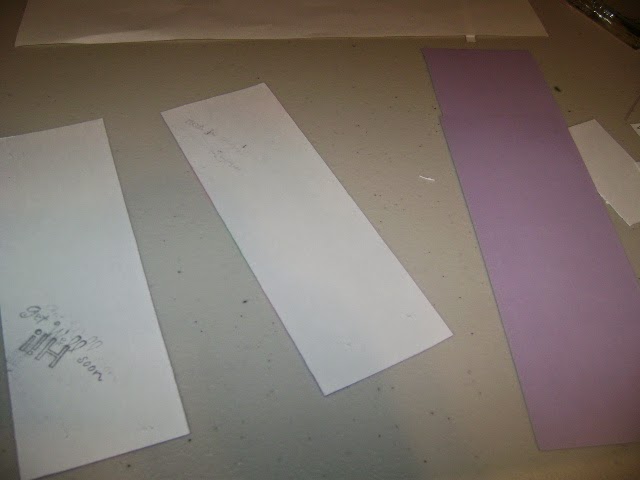
1. What you do first is cut two your base layer at 6 1/4 x 2 1/4. I used a light purple. This is not pictured; however, you can see the cut pieces further below. 

2. Next, cut two white pieces of card stock at 6 x 2. Adhere with temporary tape to a piece of white paper. You can alternatively just hold the piece of paper. This is what I do. 

3. Using the pigment ink and the sponge daubers, pick a color and begin moving in a circular motion in the spot you want. I usually choose the corners. My first color is purple. Pictured below.


4. Pick another color and do the same, but blend the color into the previous one. My second color is pink.


Here's a picture of picking up ink using the dauber.


5. Pick a third color (if you wish) and do the same as step 4. I chose blue and green to mix giving it a pale teal look.


And the 2nd layer is finished.


6. Cut two pieces of white card stock at 3 x 1 3/4. (Or, measure one to fit the stamp you use.) This measurement is for the flower stamp. If you are interested, I found this stamp at JoAnn's online and had it shipped to my house

7. With StazOn Jet Black ink, stamp the image onto both pieces of cardstock.


 8. Now, adhere the stamped images onto the 2nd layer by using tape. This is a Scotch Tape glider. I chose to place mine in the middle and at the top.


9. Attach tape to the back of the 2nd layer and attach them to the base color.  (Here's the purple base layers.)


10. When you have finished, send them through a laminator following the instructions provided by the machine. If you want to add ribbon, punch a hole into the top of the card after laminating and add ribbon. I chose not to do so at this time, but may add some ribbon when I find the right one.


From Dande Creations, I wish you a happy National Book week and urge you to get lost in a book after you finish crafting some bookmarks!

Sunday, January 18, 2015

Revealing the Theme - National Book Week

Hello again! It is time for our second reveal week here at Dande Creations. This one is pretty fun and something that holds a lot of room in my heart. This week is National Book week. The essence of this week is to inspire others to read especially young children who are constantly bombarded with too much mind noise. Yep...mind noise! America has become pretty materialistic and full of advertisements. Take a look the next time you drive somewhere. How many advertisements do you see? Or when you watch something on television? These things are so distracting, which makes books a WONDERFUL thing. We can imagine the story with little to no interruption. It's quiet. Above all, it engages our mind.

One of my early childhood memories is how my third grade teacher brought to life the stories of C.S. Lewis. They were magical and made me want to delve deeper into the worlds authors create. So this week, I am dedicating the week to celebrate the National Book week.

This week's Make it Monday utilizes a technique I love. I am not going to tell you what it is. You will have to come back tomorrow and check it out. What I can do is provide a list of the materials for the project and perhaps you can guess.


Materials
Paper cutter or scissors
Ruler
Pen (if you don't use a paper cutter with a ruler attached)
One main color (backing)
A sheet of white card stock
A small section of ribbon (optional)
A laminator
A laminator sheet
A hole punch
Sponge Daubers
Pigment ink
A stamp if you want that
StazOn Jet Black ink (for stamp)
Acrylic block (for stamp)

See you tomorrow crafters,
Sarah