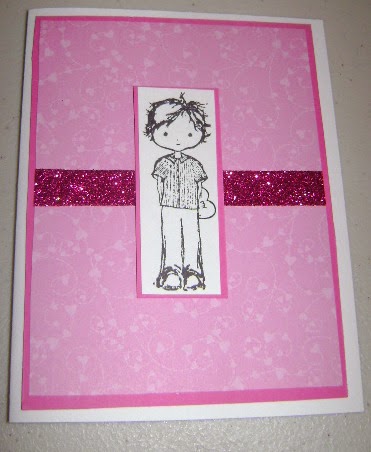
Showing posts with label paper card. Show all posts

Saturday, February 14, 2015

Another Scrappy Saturday - V-day Cards for Kids

Happy Valentine's Day! What a great day for Scrappy Saturday to fall on! I am sure that you are more than ready for the holiday to be over. Don't worry...by the time today is done Easter will have already made its way onto the store shelves. It is getting a bit crazy. And that is coming from a woman who loves holidays. On to today's project...

Okay. I will admit readily that not everything used in these cards are scraps, but some of it is. So it qualifies by a hair. Right?

My inspiration? Well...love and hearts. (gasp) Of course...to match the holiday.

What is the one thing that you might forget to purchase for your children on V-day? Well, that would be small cards to give away for their class. I remember a time when we actually made the cards to give to each other. Only the richer students purchased cards, but I was super happy to get the homemade ones. So when I was thinking of a quick and easy Scrappy Saturday project, this was it! Who wouldn't enjoy making these?


Materials:
Paper cutter
Scissors
Roller tape
Scrap sheets of plain colored card stock (I used red, dark red, pink, and blue)
Scrap sheets of designer paper (I used hearts)
An I love you stamp or similar Valentine's stamp
A (To and From) stamp
Things to embellish if you wish


Dimensions

Plain Colored Card stock - 4 x 2 1/2
Designer Paper - 3 3/4 x 2 1/4

1. Cut all paper first. I made 8 pretty quickly. These are so small that you can make a bunch up with ease.


2. Turn the plain colored card stock over and stamp with the To and From stamps. At this time, also stamp the designer paper with your V-day stamp of choice. Mine is an I (heart) you stamp.


3.  With roller tape, adhere the designer paper to the backing.


4. Congrats, you can embellish now if you wish.


I did choose to embellish with some heart puffy stickers, ribbon, glitter tape, and rhinestones.


Here they are finished. The center one is partly ripped because I pulled too hard on the ribbon. I do not have children, so these are heading to my little nieces and nephews for a surprise piece of mail from Aunt Sarah. But you do not have to use ribbon to embellish. The point is to create quick and easy V-day cards for your child's class. You can go a step further and stamp the outside with an open stamp that they can color! Let your children help!


Happy Valentine's Day
Sarah

Monday, February 9, 2015

Make it Monday - V-day Cards

Yep! You read that right. Cards! I recently purchased two paper packs. One is 6 x 6 paper and one is 4 x 7 paper. They have no particular theme which makes them perfect for everyday card making. I was inspired when I found three pieces of "heart" papers inside. There was one more that was blue and green, but it remained unused. It would work perfectly for a more "manly" love card. I may make one since I have two men in my life that I love and who I appreciate.

These cards are pretty fast. Once you get the hang of making cards, they come together very quickly. Cut all the mats at once. And have everything at hand. You do NOT need a lot of things to accomplish professional looking cards. I do not have much in the way of stamping materials, but I do purchase some every once in a while. Think outside the box!

Let's get to the project.

Materials
Paper cutter
Scissors
Roller tape
Pop dots
Ribbon
Glitter tape
White card stock for card bases
Red and Pink card stock for Layer 1
Pattern paper for layer 2
Small amount of white card stock for stamps
Love themed stamps
Small amount of red and pink card stock for stamp mat
Rhinestones

Here's the dimensions

Card - 4 1/4 x 5 1/2 when folded. Meaning 8 1/2 x 11 card stock cut in half.
Layer 1 - 4 x 5 1/4
Layer 2 - 3 3/4 x 5

I used 1 red Layer 1 and 2 pink layer 1. I also used three different Layer 2 pattern papers. All of them have a love/heart theme. I used 1 red stitch ribbon measured to around 12 inches. I used 2 pieces of glitter tape measured at 4 and 5 inches. The stamping I measured as I did it. This will vary for you based on the stamp you used.


Here's the first mat completed. This is the red version with red heart pattern paper and stitched red ribbon. 


This shows the pop dots I used to put the stamp on the mat.


Here's the finished product.

Because the layers and bases of this card are the same, I am not going to show the other three cards being made. I am going to show you the finished versions. So here's the other two cards.


(Prima Stamp)


(Sentiment Stamp)


These cards were fun to make and suit my "love" of pink. What are you crafting for V-day?

Sarah

Saturday, February 7, 2015

Another Scrappy Saturday - A Chocolate Colored Card - Photo Heavy

Let's face it. The last two months of 2014 had us faced with the temptation of calorie laden foods. Then January hit and we were (hopefully) able to get back into the swing of proper eating. And then bam! February hits and every store is laden with more tempting chocolates and candies for a holiday about Love. So when the first week of February ended up being themed chocolate, I had no clue I would be caving and doing a special Food edition of Make it Monday to break the cycle of normal calorie intake! So in an attempt to reign that crazy haired, crazy eyed, Chocolate maniac in, I am going to make a card for Scrappy Saturday.

A chocolate colored card. One without calories. In fact, it burns calories!

The inspiration is the wrapper of a chocolate bar. The sentiment and stamp was chosen to match a Dove chocolate piece that has an inspirational saying inside. (I so love Dove milk chocolate. Yum!)


Materials:
A paper cutter
Scissors
Roller Tape
Scott's Magic Tape (transparent or similar brand)
Acrylic block
Stamp set
Staz-on Brown Ink
Tim Holtz Distress ink in Walnut
A sponge (I use a makeup sponge - super cheap.)
Silver or gold thread
1 card base (white)- 5 1/2 x 4 1/4
Layer 1 (tan) - 5 1/4 x 4
Layer 2 (designer paper) - 5 x 3 3/4
Scrap piece of white paper
Scrap piece of tan paper for stamp mats


Remember: The stamps I use or the paper is relatively easy to change for what you have on hand. Use this as a guide.

Before starting - I cut all my papers and base to have them ready.

1. I started by stamping my sentiment and stamp on white card stock. I always stamp on a larger sheet and cut them out by hand.


2. Using Tim Holtz, Walnut Distress ink, I sponge around the outside edge of both stamped images to create a contrast on the tan background.


3. Adhere (roller tape) the stamped images to the tan background, and hand cut them out.


4. Here they are cut out.


5. Using a piece of Scott's tape, adhere the gold (or silver) thread onto the back of the designer paper.


6. Wrap it around how many ever times you wish. I chose five. Once you like the look, cut the thread and attach with another piece of tape on the back.


7. Using roller tape, attach Layer 2 to Layer 1. Then attach with roller tape to the card base.


8. Using pop dots or foam tape adhere your stamps to the front. I positioned my flower near the center of the card with the sentiment at the bottom. You could easily adhere the flower in the center and use the sentiment inside.


And that is my chocolate inspired card. Who couldn't use a push to enjoy life's moments? We all get lost in life sometimes. Having a push in the right direction is great!

Happy Saturday!
Sarah

Thursday, February 5, 2015

Throwback Thursday - The Color Chocolate

There is something about the color brown that pulls at my tension and allows me to just relax around it. Perhaps it is the connection between chocolate (the candy) and the chemical reactions it gives to humans that creates that relaxation. What I know is that I am the type of girl that loves chocolate and Tiffany blue together. So much in fact that my living room and bedroom have those color themes. 

When I make cards, I usually try to find a theme. It could start with the first layer color or a piece of ribbon. The Throwback card I am sharing today is one that I made around a stamp. I found this stamp and a few others in the clearance section of JoAnn's online. It was when I first started stamping. I instantly fell in love with the hand drawn feel of it. The lines are so delicate. And it just fit.


So I used the owl as inspiration, but stuck to creams and browns as my color theme. As you can see, it turned out to be a good choice. Chocolate on Chocolate on cream filled chocolate. This is my chocolate share for the week.

What is your go-to colors?

Monday, January 26, 2015

Make it Monday - Inspiring your heart with Art

As a lover of art and creativity, this is a fairly simple week to develop in terms of crafting. I have previously made dauber projects, but this one really was super fun to do. I started out with a different idea. As I started working though, I quickly changed my tactics. As it is getting closer to Valentine's Day and the theme is Inspire your HEART, I chose to make this as a heart.

Here's the picture - with a view of the mess on my craft table while crafting!


Note: This, like most of my crafting posts this year, will contain more written instructions and less pictures.
If you would like step to step pictures with this technique stay tuned to Scrappy Saturday on 1/31/2015.

Materials
Paper cutter or scissors
Ruler
Pen (if you don't use a paper cutter with a ruler attached)
One card base
One main color (backing)
A sheet of white card stock
A sheet of white copy paper.
Sponge Daubers
Pigment ink
A stamp if you want that
StazOn Jet Black ink (for stamp)
Acrylic block (for stamp)
Roller Tape


1. Cut a piece of 8.5 x 11 card stock in half to obtain two 4 1/4 x 5 1/2 cards. Score one in half, making your card.

2. Cut a piece of purple card stock to 4 x 5 1/4. This is the "backing."

3. Cut a piece of white card stock to 3 3/4 x 5. This is the mat. Take a small piece of tape and place it on the back of this piece and place it on top of your sheet of white card stock. This will protect your surface from ink.

4. Using the white copy paper, cut a heart free hand. If you want to use a die cut machine to create a heart you like, do so. I don't have one, so I used my scissors and pretended I was in elementary school. Place a small piece of tape on the back and adhere it to your mat.

5. Using the daubers, choose whatever colors you wish. Rub them across the ink. Holding the side of the heart down, begin in circular motions to rub the ink onto the mat. Repeat until you have the entire outline of the heart. You can remove the heart now if you wish or continue to blend the ink around.

6. Once finished, take the mat and and adhere it to the backing with tape. I chose not to embellish any more. Adhere the layers to the card base.


What is so lovely about this card is that it opens your mind to using this technique in many other ways. The original way I saw this accomplished was using glossy photo paper which made the finished product glossy. I prefer a more matte card, but feel free to explore this type of technique.